Congrats! You’ve decided to save tens, or even hundreds of thousands of dollars by selling with pocket. Or, maybe you’re just interested in learning more. Either way, you’ve made the right decision. When selling with pocket, you get all of the value of working with a broker without any of the cost.
Ready for a better way to sell? Let’s go!
What You’ll Learn:
How to sign up (just in case you haven’t already)
and
The 4 steps to selling with pocket:
- Listing setup
2. Pre-bid: bring on the buyers!
3. Bidding opens
4. Post-bid: offer and acceptance
Signing Up
Signing up is easy and only takes a few minutes. To get started, create an account and enter your address. From there, we automatically populate your home’s details and all you have to do is sit back and confirm their accuracy.
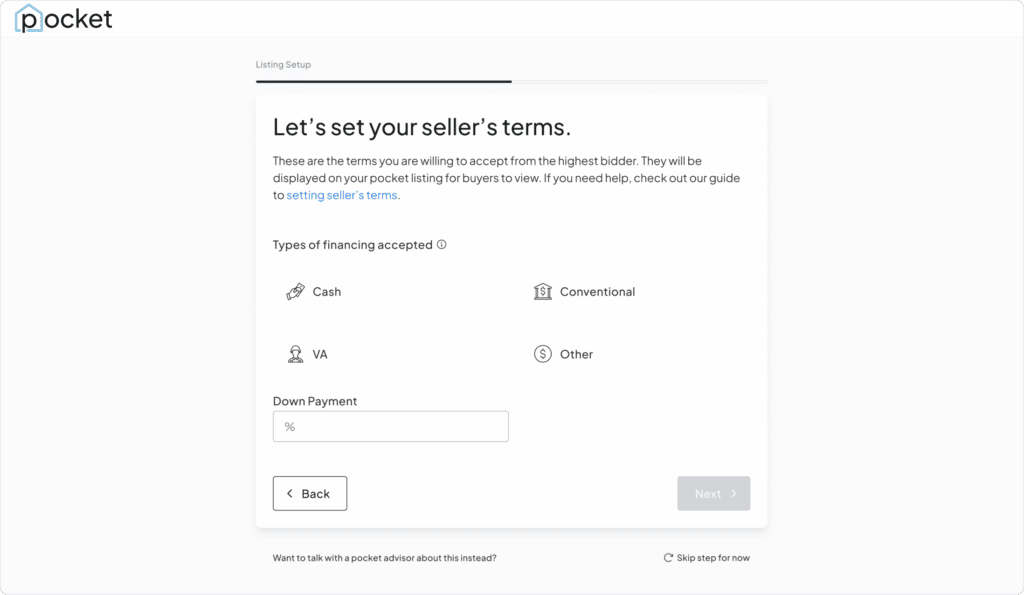
Next, you’ll set your seller’s terms. This allows buyers to see exactly what you are willing to accept (other than price) for the sale of your home and allows us to dynamically populate the Purchase and Sale Agreement (PSA) with those terms.
And finally, you’ll set your reserve price. This is the minimum price that you are willing to accept. The reserve price is not displayed to buyers and even if your reserve price is met you are under no obligation to sell at the end of bidding.
If any of this sounds confusing, don’t worry, we’re here to help. As soon as you start the sign up process, you will be assigned a local pocket advisor (a member of our customer service team who is a licensed real estate broker in your state) to help answer any and all questions throughout the entire selling process.
The 4 Steps to Selling With Pocket:
Before we start, it’s worth mentioning that throughout the process of selling with pocket, in addition to your pocket advisor, you will also have access to a seller dashboard. Your dashboard will keep you informed of all steps, stages, comments, bids, and action items in real-time.
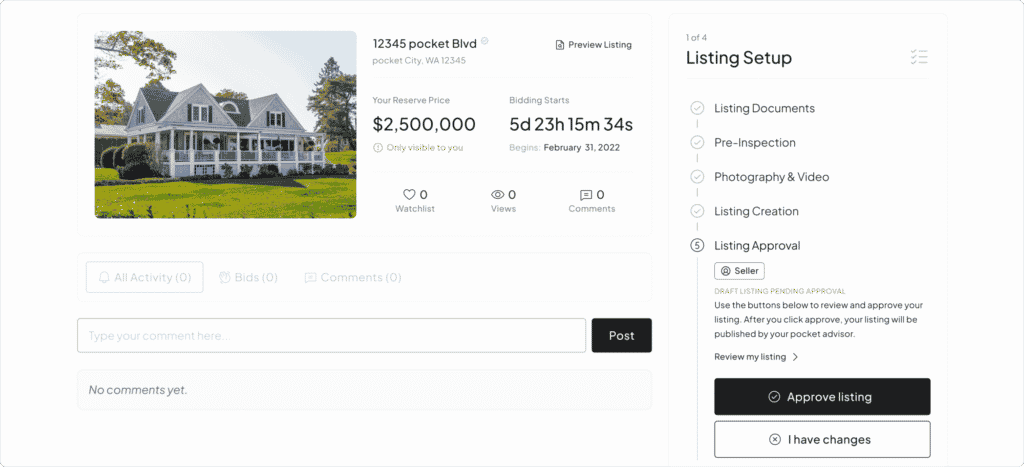
Step 1: Listing Setup
Now that you’ve signed up, it’s time to get your home listed! It’s a quick and easy process that only requires you to upload a few documents and provide a few times when your home will be available for photos and the pre-inspection walk-through.
The process:
- (You) send us the necessary listing documents – seller’s disclosure and proof of ownership.
- (We) schedule the pre-inspection + photo and video – working around your schedule to find times that work best for you.
- (We) create the listing – add photos and video, upload reports, write the property description, pull the title commitment and get your listing ready for review.
- (You) approve it – or kick it back to us with changes and we make adjustments.
Depending on your schedule, this entire process can take as little as a few days but we ask for a week, just in case. For more information, check out our listing page FAQs.
Seriously, that’s it. Now that your listing is approved, the process starts getting really fun!
Stage 2: Pre-bid Starts!
The pre-bid period is the 15-30 days prior to the start of bidding when we generate demand from potential, pre-qualified buyers (all buyers have submitted a pre-approval letter or proof of funds) and convert them into seriously motivated bidders.
During pre-bid, buyers will:
- Review your listing on pocket – your property details, pre-inspection report, title commitment, seller’s disclosure and the purchase and sale agreement.
- Ask you questions – about your home, the neighborhood, and relevant property details.
Pro tip: while you are not required to respond to buyer questions, we highly encourage it. Engaged sellers receive more bids and the more bids, the higher your home’s sale price.
- Attend an exclusive preview – this is a single-day open house exclusively for pre-qualified buyers scheduled at your convenience and hosted by your pocket advisor.
Pro tip: it’s best to schedule your exclusive preview for the last day of the pre-bid period in order to allow as many interested buyers to attend as possible.
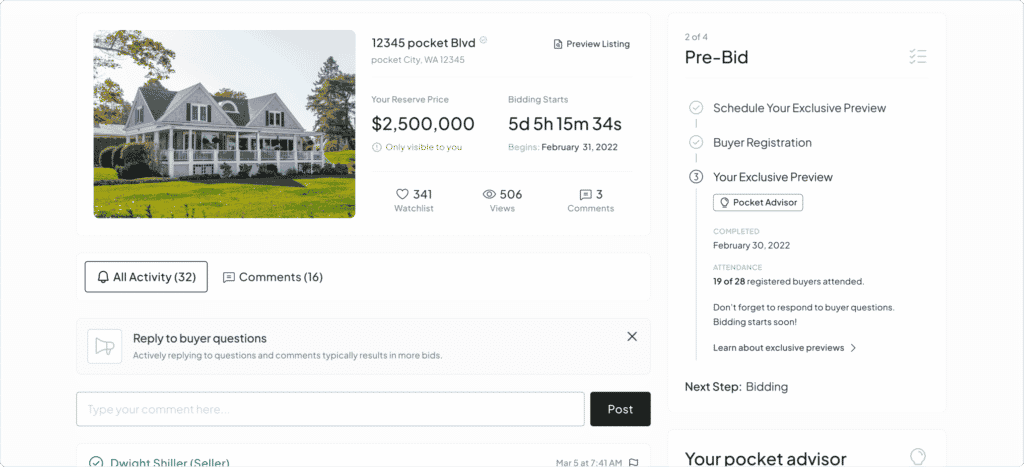
Throughout the pre-bid period, we track everything for you: views, saves, comments, exclusive preview registrations, attendance, etc. so that you can see real-time demand for your home as we head into bidding.
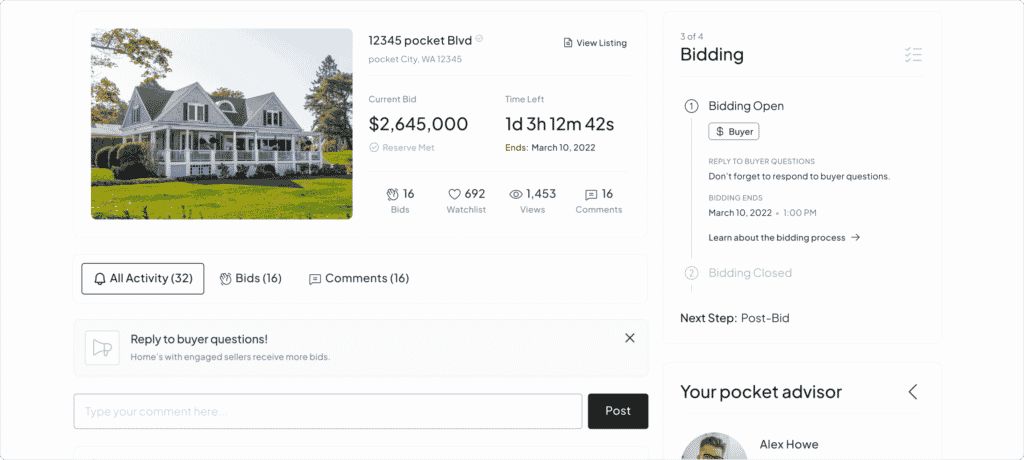
Step 3: Bidding Opens!
This is when it starts getting really, really fun. The bidding period is open for 7 days and the only thing that we ask of you is that you respond to questions and comments from prospective buyers. Again, this is not a requirement but definitely a good idea if you want to sell your home for the highest possible price.
A few important things to know about bidding:
- Bids are not legal offers. The final bid becomes a legal offer when it is added to the Purchase and Sale Agreement (PSA) as the purchase price and then signed by the winning bidder.
- By placing a bid, buyers have agreed to your terms.
- Your reserve price is not displayed on your listing but every listing indicates whether or not the reserve has been met.
- If a new bid is placed within the last 5 minutes of the bidding period, 5 additional minutes are added to the bid clock. This gives all buyers the opportunity to bid or re-bid up to their highest bid and provides you with the highest possible sales price.
For more information about bidding, check out our bidding FAQs.
Step 4: Post-bid – Let’s Get You to Offer and Acceptance!
After the dust has settled and all the bids are in, the post-bid process begins. And, while this is definitely less fun than watching the bids roll in, it is the necessary next step of the selling process.
Post-bid involves:
- Accepting or rejecting the final bid.
- Digitally signing the Purchase and Sale Agreement (PSA).
- Starting the closing process.

Step 4.1: Accept or Reject the Final Bid
At the end of the bidding period one of two things will have happened:
- Your reserve was met – awesome! The PSA will automatically be sent to the winning bidder to sign via DocuSign as a formal offer.
Remember, even if your reserve was met and the winning bidder signs, you are still under no obligation to accept their offer. However, given that the buyer is paying at or above your reserve price and there is no cost to sell with pocket, commission or otherwise, you would be crazy not to!
Or:
- Your reserve was not met – we apologize. We tried our best, but buyers were just unwilling to go that high.
However, there still may be light at the end of the tunnel. If the highest bid does not meet your reserve price but you still wish to accept it (because it’s high enough and you’re saving so much money in broker’s fees using pocket), we can, upon your request, send the PSA to the highest bidder to sign as a formal offer.
If you decide to accept the final bid, congratulations, you’re a winner, read on!
However, if you ultimately decide to reject the highest bid, whether or not it meets your reserve, your pocket selling process is over. We thank you for giving us the opportunity to help sell your home and we wish you the best of luck in getting it sold.
Step 4.2: Digitally Sign the Purchase and Sale Agreement (PSA)
Immediately after the buyer signs the PSA, the partially executed PSA will be available for your signature in your dashboard. After signing, you will be able to download the fully executed PSA.
A few important things to revisit before signing:
- The terms in the PSA will always be your terms, the same terms that you set when signing up.
- The purchase price in the PSA is the final bid amount at the end of the bidding period.
- The buyer does not have the ability to change any of the terms, including the price, in the PSA. After receiving the PSA, the buyer is only able to add their contact information, title company and sign.
- All PSAs are digitally signed through DocuSign’s secure platform.
- When you sign the PSA, there is mutual acceptance and the PSA becomes a legally binding agreement between you and the buyer.
Assuming that you’ve signed, another congratulations is in order and you’re off to closing!
Step 4.3: Start the Closing Process
All good things must come to an end and this is the final step in selling with pocket. pocket is not a title or escrow company and is not involved in the closing process. However, starting the closing process is as simple as notifying the pre-selected title and escrow company (or companies) that you and the buyer have both signed the PSA.
Even though we are not involved in the closing process, we have partnered with Endpoint in order to provide continuity and world-class customer service through the closing process. If you and the buyer have chosen Endpoint as your title and escrow company, they will automatically be sent the required information to begin the closing process.
Note: We do not monetize our partnerships. Our partners are selected based on their expertise and dedication to customer service.
For more information about post-bid, check out our post-bid FAQs.
And That’s It!
Start to finish, selling with pocket is that simple. All of the value of working with a broker without any of the cost. We give you the tools you need to succeed without wasting time or money.
If you’re ready to save tens or even hundreds of thousands of dollars using a better way to sell, sign up and let’s get your home sold!